For our “Battle of the NodeBots” Hackathon project, we will be building a bot to compete against other bots. We have a kit which includes the following components.
- (1) SainSmart Uno Arduino Clone
- 5mm Wood Platform – (1) 3” x 6.75” panel and (2) 2.5” wheels
- (2) Parallax Continuous Rotation Servos
- (1) 5/8” Ball Caster
- (1) Small Breadboard
- (6) Solderless Breadboard Wires
- (2) 3-pin Headers
- (1) 10’ USB Cable (A to B)
- (1) 9v Battery
- (1) 9v to 2.1mm Battery Clip
- (4) Zipties
- (2) 1” Double-Stick Tape
- (6) #6x3/8” Self-Drilling Screws
You are encouraged to build your bot however you want, but this is how you can build it without any modifications from the original design.
Lay out your parts
You want to get a feel for where everything will go. Lay your major components out on the board and rough-in where you think you’d like them to go.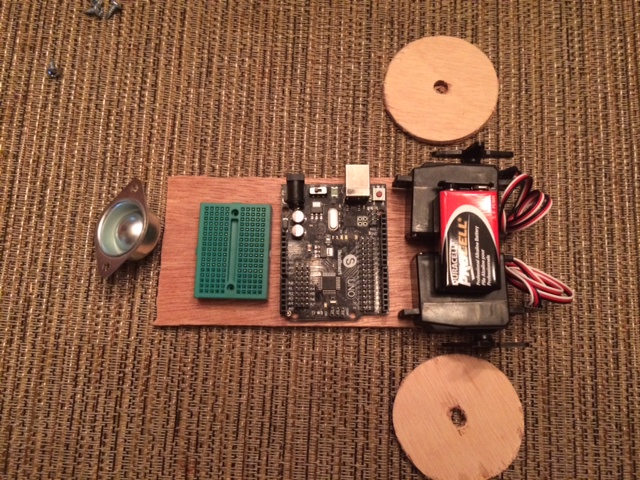
Attach your wheels to your servos
The easiest way to do this is to remove the servo horn and attach the horn to the wheels using the self-drilling screws. The holes in the servo horn are smaller than the screws but these things make quick work of the plastic and go right through to the wood. Just make sure they are centered. Reattach the horns when you are done.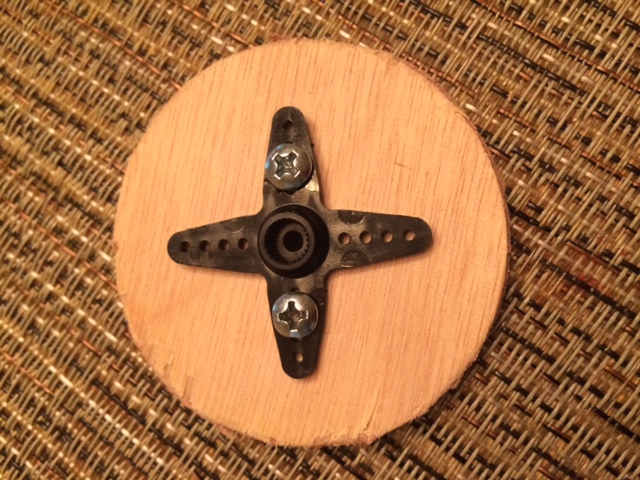
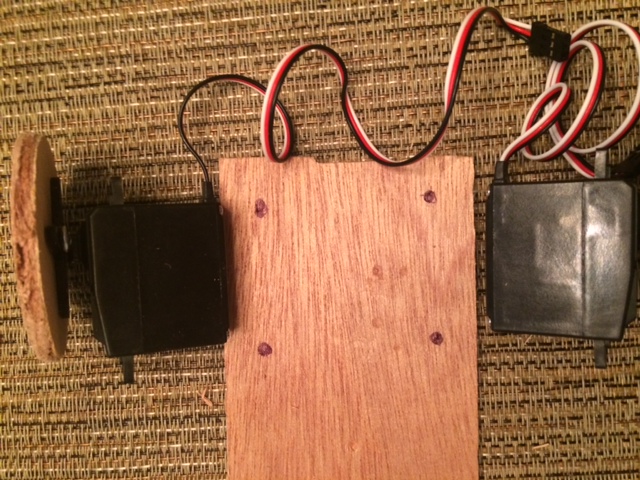
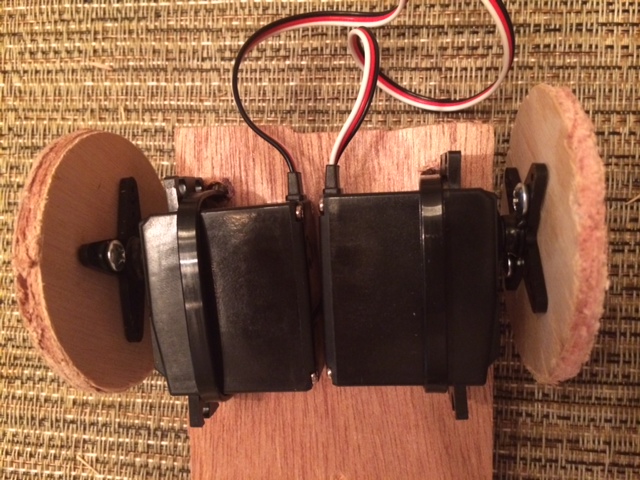
Attach the servos to your chassis
You can do this however you want. A quick-and-dirty approach is to use double-sided tape. I prefer zip-ties. Figure out where you want the servos to sit and mark it on the board. Use a drill to punch a hole through the wood. Attach the servos to the wood using zip-ties and snip off the excess zip-tie.
Attach the caster wheel to the bottom of the chassis
The self-drilling screws are really useful for this.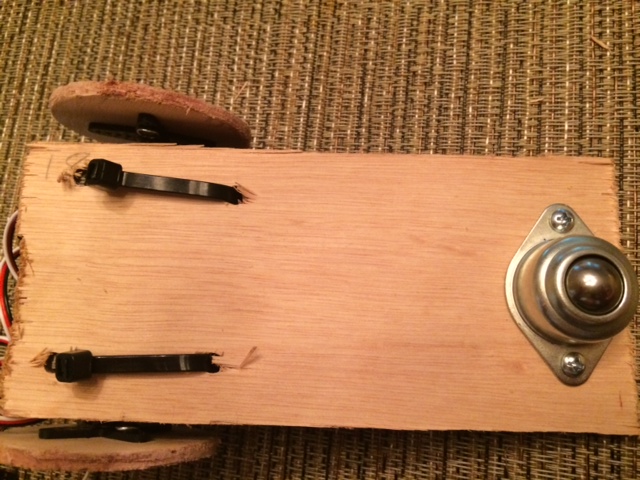
Attach the Arduino and Breadboard
Affix the Arduino using double-stick tape. Affix the breadboard using the attached mounting tape.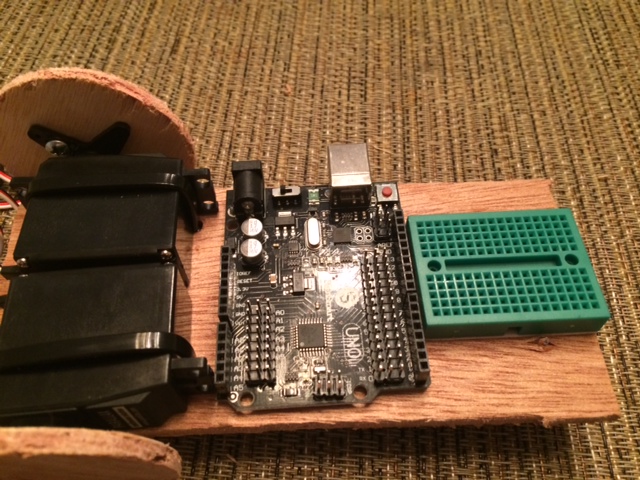
Mount the battery
Using double-stick tape, affix the battery to the bot. Connect it to the Arduino using the 9v clip.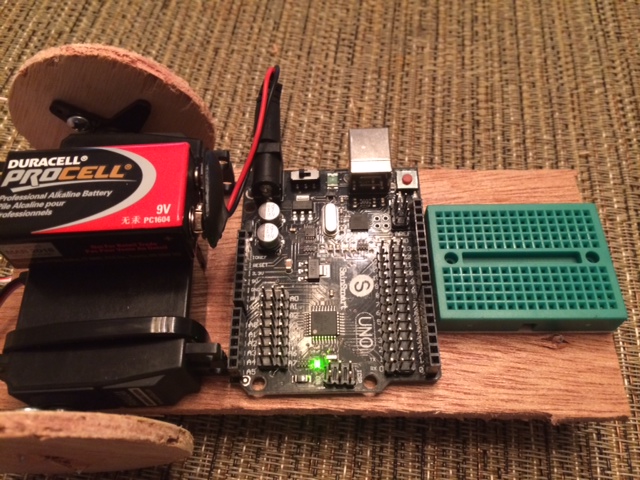
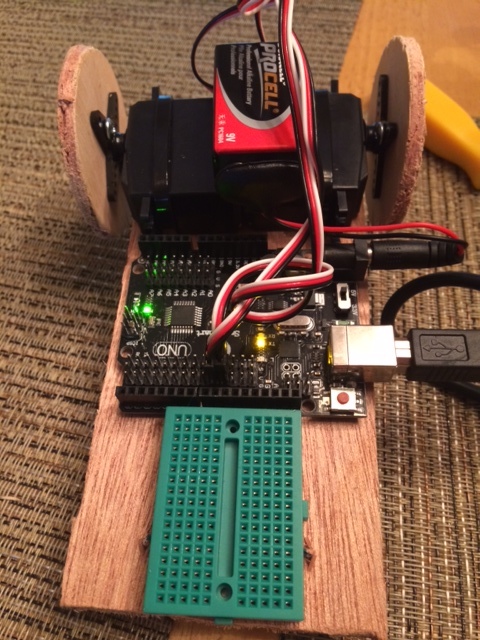
Power the servos from the board
You are not likely to keep the servos here permanently, but this is a good starting point. Pins 9 and 10 support PWM signals, which are best for servos. You can connect them to the SVG pin headers for now. The white leads are the “signal” for the SVG pins.
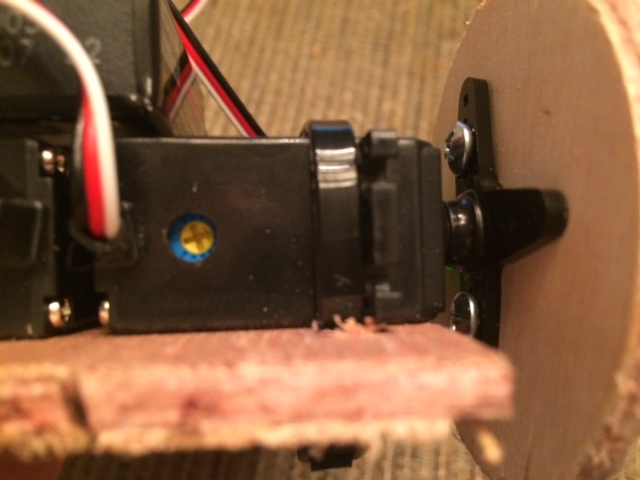
Your servos may start spinning now. If that happens, you can trim them using the screws on the back of the servos. You may need to do this again once you have hooked your system up to the software.
Start programming your bot!
Now you have a working bot. You can plug your USB cable into the board and go to town. If you haven’t already gotten yourself bootstrapped (or with Visual Studio), now is a good time.
Take a look at the servo API in Johnny-Five to get you started. Here is a simple example that will rotate your 10-pin servo clockwise.