Building Your NodeBot

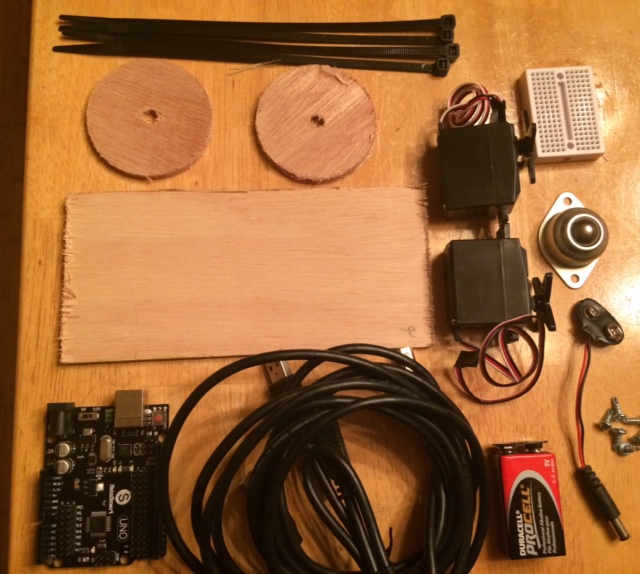
For our “Battle of the NodeBots” Hackathon project, we will be building a bot to compete against other bots. We have a kit which includes the following components.

You are encouraged to build your bot however you want, but this is how you can build it without any modifications from the original design.

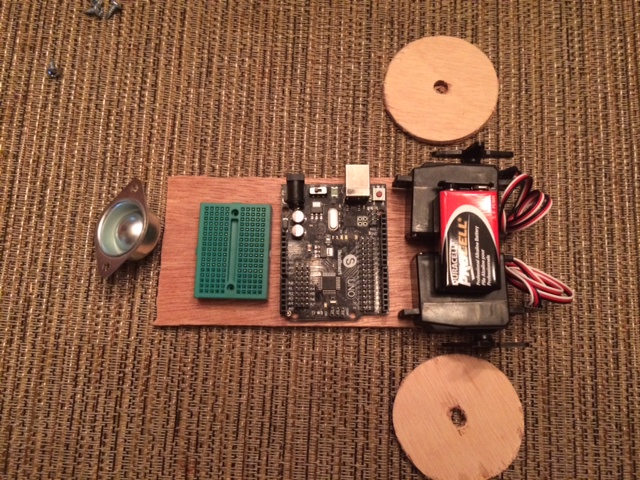
Lay out your parts

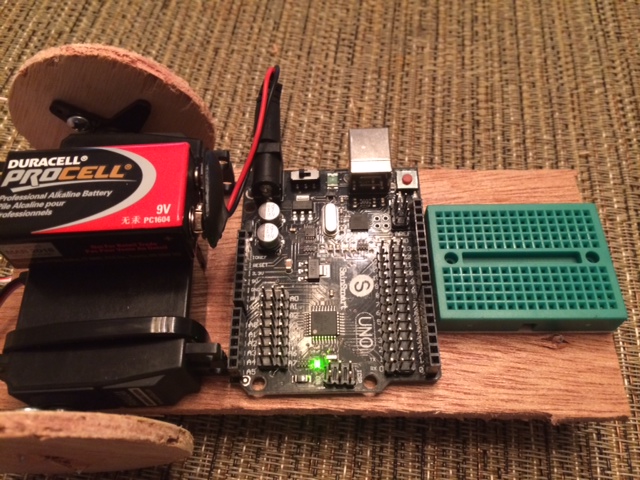
You want to get a feel for where everything will go. Lay your major components out on the board and rough-in where you think you’d like them to go.
Rough-out the parts

Attach your wheels to your servos

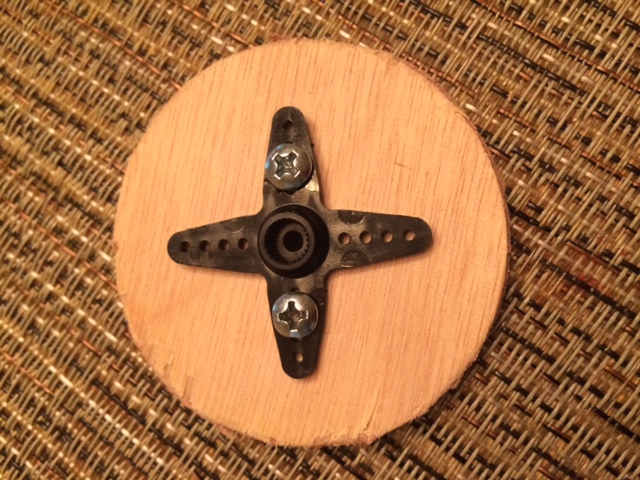
The easiest way to do this is to remove the servo horn and attach the horn to the wheels using the self-drilling screws. The holes in the servo horn are smaller than the screws but these things make quick work of the plastic and go right through to the wood. Just make sure they are centered. Reattach the horns when you are done.
Attach the wheels to the servo horns

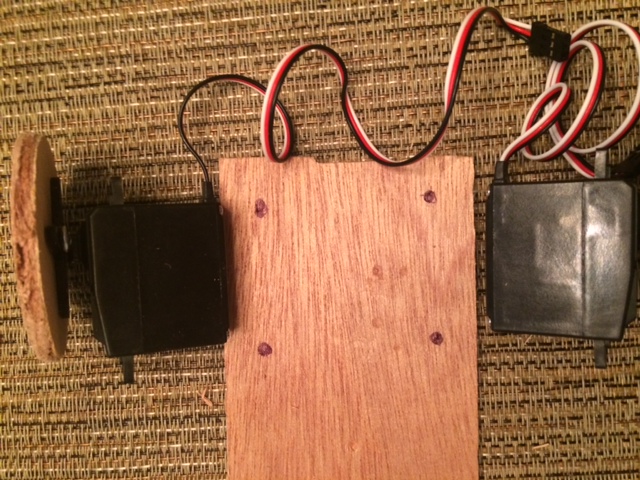
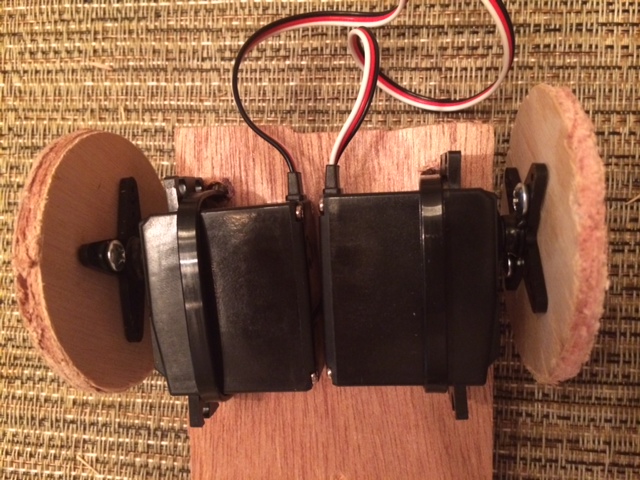
Attach the servos to your chassis

You can do this however you want. A quick-and-dirty approach is to use double-sided tape. I prefer zip-ties. Figure out where you want the servos to sit and mark it on the board. Use a drill to punch a hole through the wood. Attach the servos to the wood using zip-ties and snip off the excess zip-tie.

Mark your servo location
Attach the servos with zip-ties

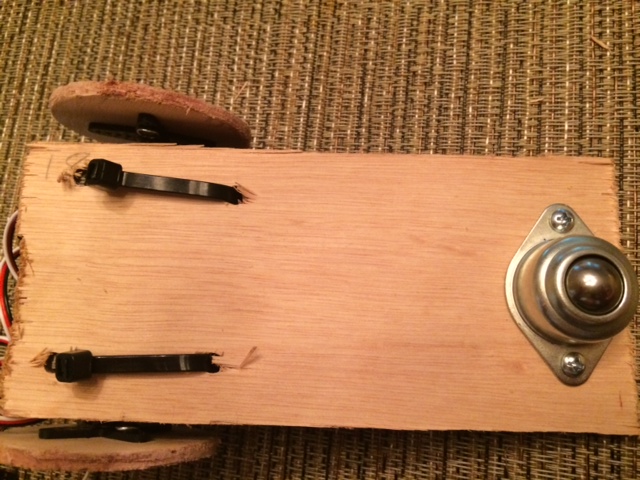
Attach the caster wheel to the bottom of the chassis

The self-drilling screws are really useful for this.
Attach the front caster wheel

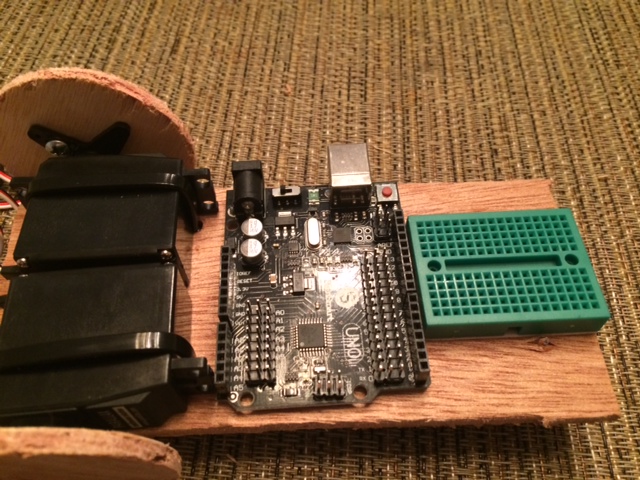
Attach the Arduino and Breadboard

Affix the Arduino using double-stick tape. Affix the breadboard using the attached mounting tape.
Affix the boards

Mount the battery

Using double-stick tape, affix the battery to the bot. Connect it to the Arduino using the 9v clip.
Affix the battery

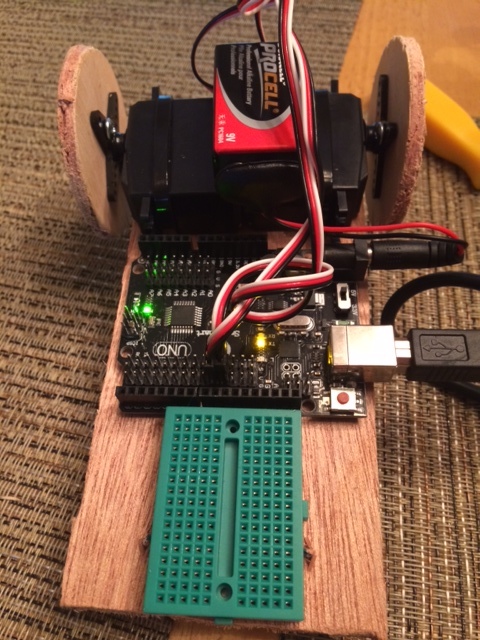
Power the servos from the board

You are not likely to keep the servos here permanently, but this is a good starting point. Pins 9 and 10 support PWM signals, which are best for servos. You can connect them to the SVG pin headers for now. The white leads are the “signal” for the SVG pins.

Power the servos

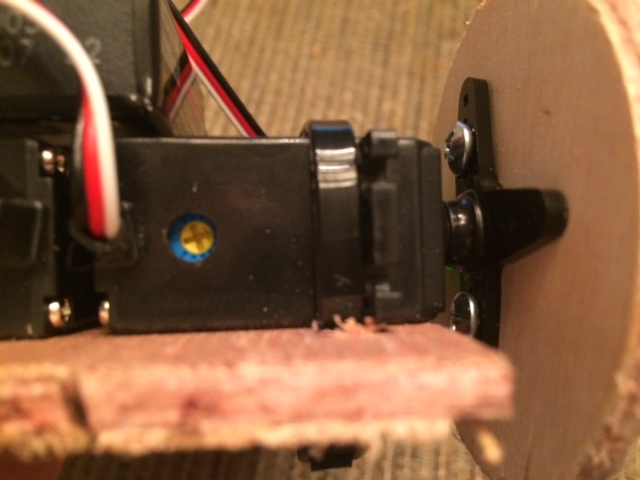
Your servos may start spinning now. If that happens, you can trim them using the screws on the back of the servos. You may need to do this again once you have hooked your system up to the software.

Trim the servos

Start programming your bot!

Now you have a working bot. You can plug your USB cable into the board and go to town. If you haven’t already gotten yourself bootstrapped (or with Visual Studio), now is a good time.

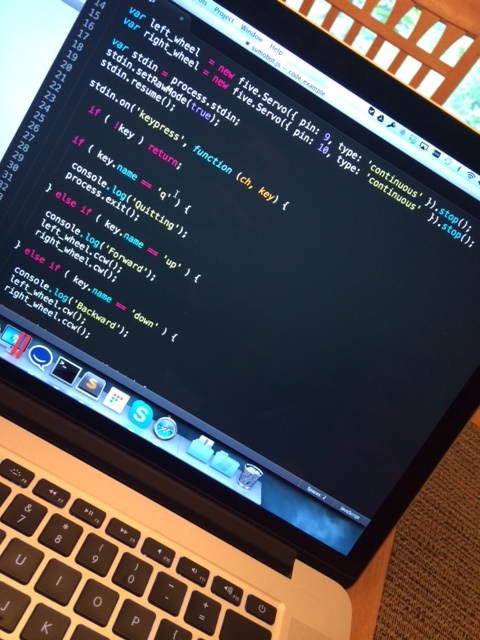
Take a look at the servo API in Johnny-Five to get you started. Here is a simple example that will rotate your 10-pin servo clockwise.
Start Programming

Rise of the NodeBots

Every 8 weeks at our company, we take two days off to hack on something new. It is a chance to try new ideas, learn new technologies, or exercise our brain in ways we don’t tend to do in our everyday roles. These “Hackathons” are fully supported by the owner of our company as he believes these periodic shifting of gears are beneficial to our creativity and to our product portfolio.

We don’t always produce something useful. Sometimes we learn that a given technology or approach is not for us. Sometimes, however, we take what we learn and apply the ideas directly to our product. Dozens of features and even full products have their roots in our “Hackathons”. They have proven to be exceptionally beneficial for the culture of our workplace.

Trying Something New – NodeBots

Nodebot Army

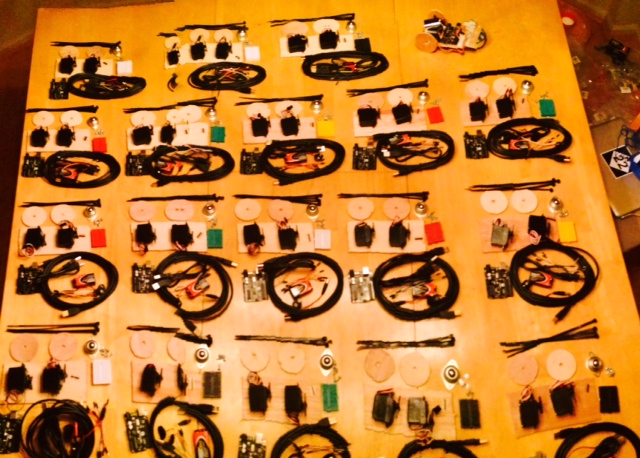
At our next Hackathon, we are organizing an event: “Battle of the NodeBots”. Approximately 20 of us will be building robots that will fight in a ring for supremacy. Everyone will be given the same base kit. If any of us build the kit like the reference bot, it is very unlikely we will win – those with beneficial innovations are likely to have the advantage.

Innovations will come in one of three forms:

  • Software: Pre-programmed maneuvers, articulated control, sensing systems, etc will help the bot gain an edge in the “brains” department. Most people will be using Node and Jonhhy-Five to program their bots, though nothing is stopping anyone from writing C code that runs on the metal.
  • Electronics: Extra servos, motors, controllers, or sensors will help the bot gain an edge in the “motion and sensing” department. This is where most of us will be learning the most. We are software developers, not electronics engineers! We will have a library of electronics components to pull from.
  • Mechanical: Wheel traction, caster location, weight, size, articulated parts, etc will gain an edge in the “physical” department. We will have a library of building supplies to pull from.

The Kit

Nodebot Army

Inspired by the SumoBot Jr. and the SimpleBot, I was able to put together a kit that came in around $45 per bag. This is the kit we that everyone will get:

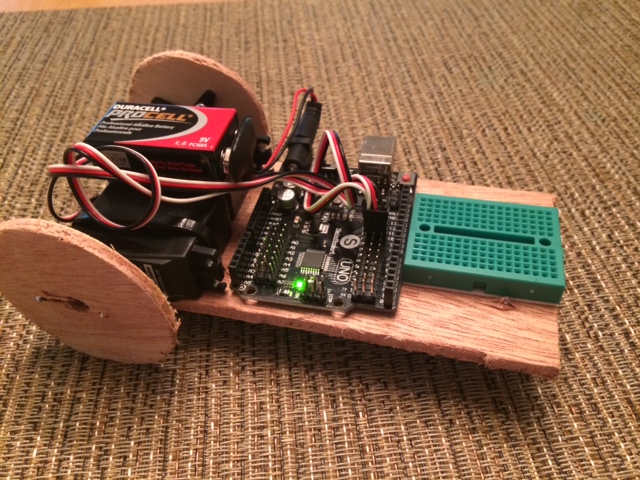
Here is the bot fully assembled:
Nodebot Army

The Lab

In order to enable everyone to be creative, we will have a stocked lab:

  • Electronics (Resistors, Capacitors, Diodes, Transistors, Wires, Headers, etc)
  • Displays (LEDs, LED Arrays, 8-Segments, Tri-color LEDs, LCDs, etc)
  • Locomotion (Servos, Motors, Gears, Propellers, etc)
  • Sensors (Light, Proximity, Temperature, Water, etc)
  • Control (Switches, Joysticks, Keypads, Potentiometers)
  • Building (Soldering Iron, Hot Glue Gun, Drills, Saws, Voltmeters, Screw Drivers, Pliers, etc)
  • Crafts (Wood, Popsicle Sticks, Dowel Rods, Wire, Flashing, Screws, etc)

The Setup

We are going to use Jonhhy-Five to control our bots. This mechanism uses serial (USB) communications to talk to our Arduino via the Firmata protocol. This will require everyone to install StandardFirmata on the board. We will have a couple of these Bluetooth to Serial adapters available if anyone feels like spending their valuable time getting it working .

More to Come!

I plan to document more about this event as I go. We’ll see how it goes. I’ll be tweeting photos and recording video of the battles. Stay tuned!

Calling Actions in Directives

The other day, a coleague asked me what the best way is to call an action on a directive. We know that directives can call back to the parent scope, but with isolated scopes, you have no way to call into a directive to execute an action. This type of thing is pretty rare in Angular. Usually, our directives respond to changes in data or state which an be based off of the built-in binding capabilities. Sometimes, however, we need to call actions on a directive. A video player directive, for example, can benefit from actions such as video.play() and video.pause().

Some of the things to consider:

  • When you have multiple instances, how do you tell them all to act?
  • When you have multiple instances, how do you tell only one to act?
  • How would multiple copies inside of an ng-repeat work?
  • We might want to avoid tight coupling (do we always?)

So I thought about it more, and I have three possible answers to this question (there are more, but these feel most natural). I am open to thoughts. Is there a better way that I am missing? I’m basing some of this off of what other widget frameworks do. Take WinForms/WPF/Silverlight/Flex, for instance. In those worlds, the controls (directives) expose methods. The caller gives it a name <widget name="foo"> and the framework creates variables for you to call: foo.bar(). Convenient, but Angular doesn’t give us this out of the box. What are some approaches to come close to that?

Setup

I am assuming a directive called “arm” which can be composed to create a “puppet”. A “puppeteer” wants to control the arms of the puppets. Each arm has an action called function wave(){ alert('wave'); } All of the code for these examples can be found here.

Events

The most obvious solution mkhere is to use events. Events are nice because they are built in. Events are also a bit ugly, however, because they broadcast. We can mitigate this by namespacing our events. The caller can call $broadcast('arm:wave') and the directive can hook that event: $scope.$on('arm:wave', wave).

This works well except that in our current implementation, we can’t send a “wave” event to a specific directive. If we borrow from other frameworks, we can just give the arm an id like this: <arm id="left"></arm>. Now, the puppeteer can call it: $broadcast('arm: wave', 'left'). The directive’s code gets a bit more complex but not too bad. It starts by binding id scope: { id: '@' } and then the event handler does this

1
2
3
4
5
$scope.$on('arm:wave', function(e, id) {
if(id === undefined || $scope.id === id) {
wave();
}
});

This works well. You can broadcast to all of them by ommiting the id, or you can call one of them by using the id. How might you do this in an ng-repeat?

1
<arm ng-repeat="arm in arms" id="arm-{{ '{{arm.id' }}}}"></arm>

Individual calls would become $broadcast('arm:wave', 'arm-' + arm.id)

Commands

Borrowing from other frameworks, this example invokes the “command” pattern. It lets the directive define some commands that the puppeteer can call. The directive would define a binding: scope: { commands: '=?' }. The directive would then set the commands object: $scope.commands = { wave: wave }.

The puppeteer can now hook up the command: <arm commands="left"></arm> and use it: left.wave();

This approach is arguably cleaner, but it introduces a new concept that isn’t native to Angular. How does it scale to ng-repeat?

1
<arm ng-repeat="arm in arms" commands="armControls[arm.i]">

Broadcast would become:

1
armControls.forEach(function(arm) { arm.wave(); });

Individual calls would become: armControls[arm.id].wave()

Controller Expose

Ok, so events are a bit chatty and more code than we want to copy everytime. Commands are less code and less chatty, but they aren’t native. It turns out that Angular already has a way to communicate via directives (directive-to-directive) by assigning functions to the controller itself. Like this: this.wave = wave;. But the puppeteer doesn’t have access to the directive’s controller.

We can expose it! Create a binding in the scope: scope: { controller: '=?' }. Then, in the controller, you can just assign it: $scope.controller = this;.

Calling it is very similar to commands:

1
<arm controller="left">

Access to the actions and ng-repeat is exactly the same as the commands option, but the way you wire it up is more Angular-like. With commands, you expose only what you want, but you need to explicitly expose everything. With controller, you only do it once, and you don’t have to explicitly wire up the action, but you now get access to everything.

Conclusion

In the end, I prefer the events mechanism if I am looking for a decoupled approach but a controller approach if I am looking for something a bit more coupled. I am soliciting feedback from the community since I know they are likely to have opinions. Again, you can play with all three approaches here. Thoughts?